Haunted Pumpkin Workshop

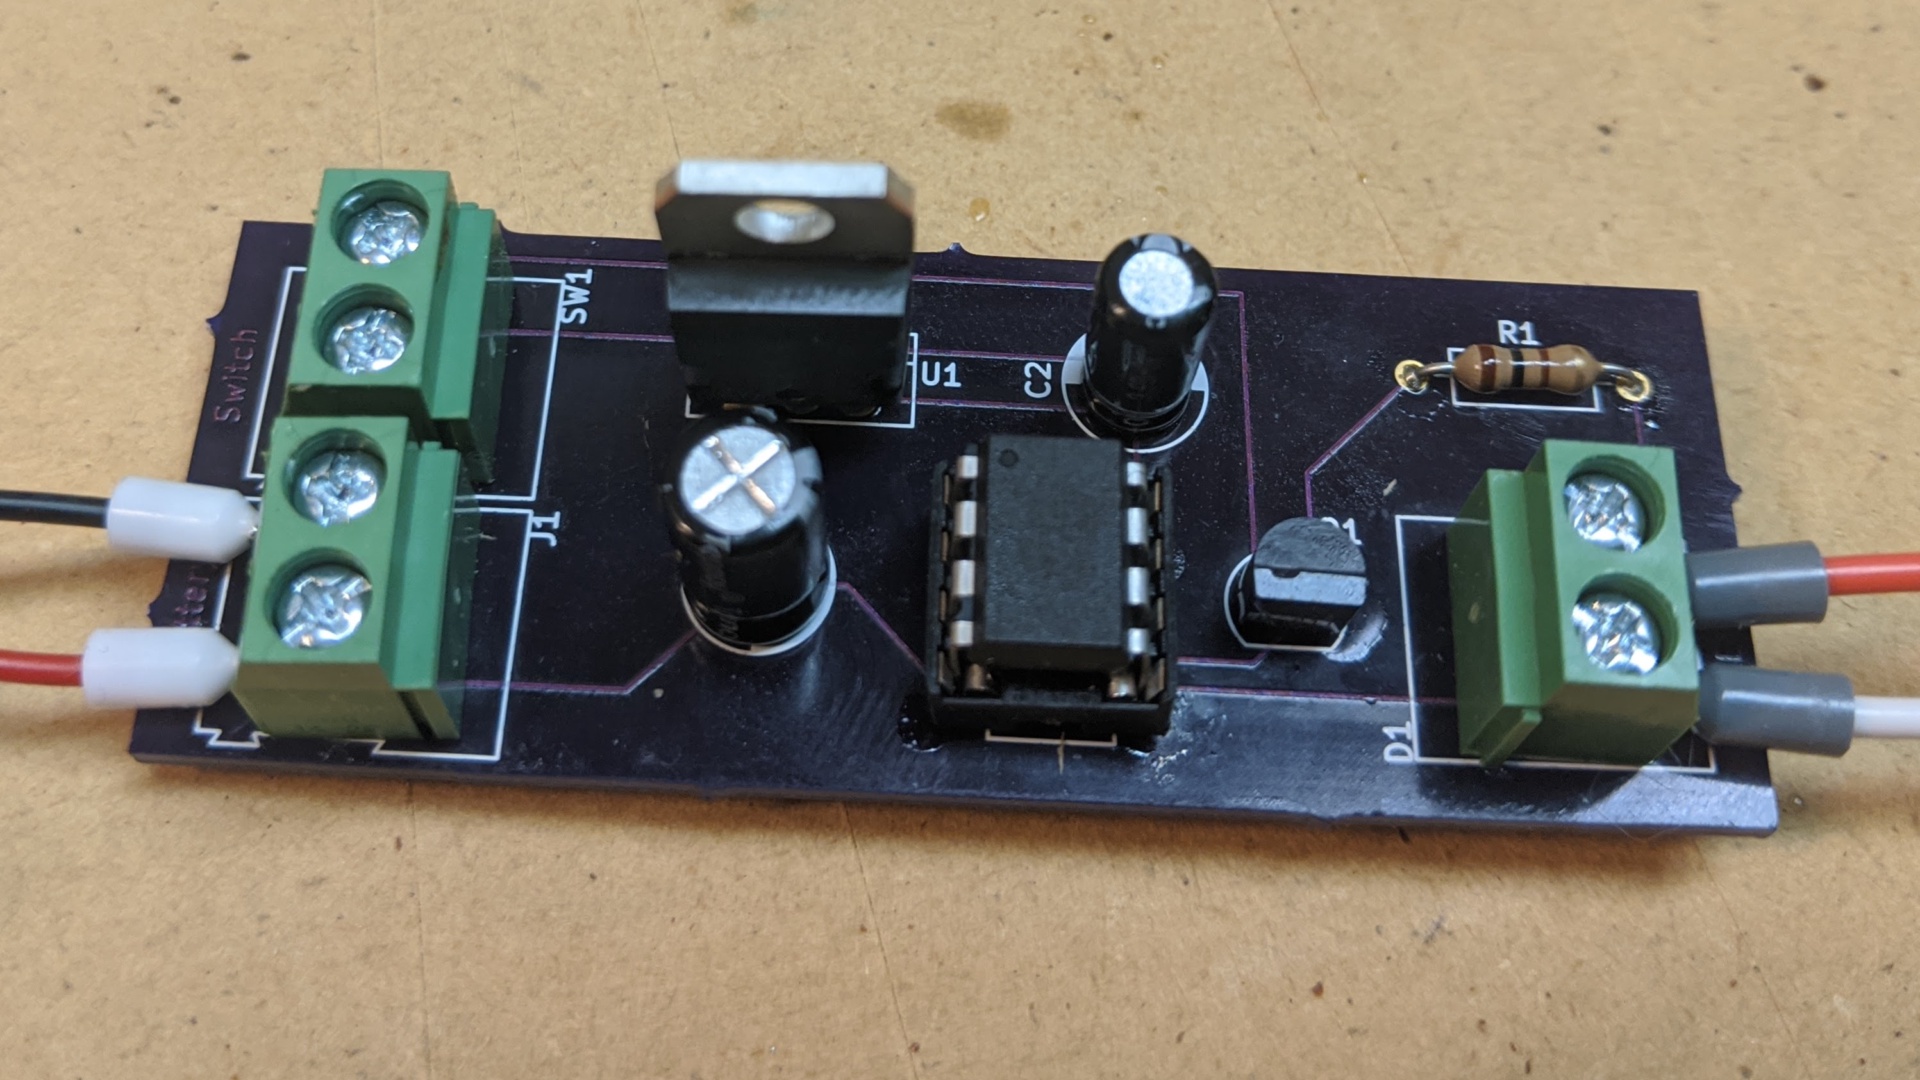
Completed Circuit Board
Get introduced to the exciting world of electronics and embedded technology with a two hour workshop on building a Haunted Pumpkin.
You will:
- Get experience soldering electronics
- Incorporating electronics with physical objects
When & How
We’ll meet via a private video link at 10am on Saturday, October 17. You’ll receive an email invitation with the proper link and calendar entry.
If that time doesn’t work for you, contact me via email to arrange an alternate time.
Before that date, you will receive a packet of electronics parts in the mail. Please be certain that your shipping information is accurate.
Materials
You will need to acquire some materials before the workshop begins.
-
Craft Pumpkin I have provided a link to Amazon, but I bought mine at a craft store, which gave me a chance to see them in person. You honestly don’t need it to be a pumpkin. A plastic rat, an old doll (the rattier the better), anything can work as a housing as long as it’s hollow.
-
White Parchment Paper. If you don’t want to see the LED’s, but just their ominous red glow, you can put parchment paper over the holes in the pumpkin (on the inside). It acts as a difuser. You can cover it with clear packing tape to make it weather resistant. You can order this online, but most grocery stores should have it in the baking section.
You can also use the sides of a plastic milk jug as a difuser. Just cut out a slightly oversized shape, and use hot glue to cover the opening on the inside. The difusion won’t be as effective, but it will have a nice ominous depth to it.
- Bell Wire - This comes as a bundle of wire with two colors of wire. It should have a solid copper core.
- Heat Shrink Tubing - Most hardware stores carry this, in multiple sizes. You will only ever use the smallest size, so just buy that. Color doesn’t matter.
- Fine Solder - Your soldering station may include solder already. Most solder sold at hardware stores won’t work. You want something finer than angle-hair pasta.
- Liquid Flux - This provides a non-oxidizing layer over the metal parts you’re trying to solder. If the metal parts oxidize, the solder will roll off into little silver balls and make you unhappy.
Tools
- Soldering Station This is a good entry-level solder station. I personally use the Hakko station. Brand is less important than the fact that it has a PID controller for maintaining a constant temperature. Please don’t use a soldering iron. They’re wonderful tools in the right hands, but take more skill and don’t provide any significant benefit.
- Flat or Diagonal Cutters for cutting component leads flush with the solder bead.
- Wire Cutters for shortening wires and stripping leads. Most home improvement stores will have these in the electrical section.
- Solder Fume Extractor Not 100% essential, but without it you’ll get a headache and burning eyes for the next day. Learn from my mistake.
- Acid Brushes You’ll use this to put the flux on the components. You can definitely pick these up at any hardware or home improvement store. Cheap plastic bristled artist brushes are sold in some paint departments, and these would also be fine. The important thing is that you’re not going to want to use this brush for anything else after you have used it for flux.
- Tiny AVR Programmer. The Microcontroller will ship with software already installed, but if you would like to modify the code, this is the device that you’ll use to put your updates onto the chip.
- Precision screwdrivers You can order these online, but most hardware and home improvement stores will have these in their tools section. They usually come with a case of variable quality.
- Sharp Knife Some of the wires are too small for conventional strippers. A sharp pocket knife will let you shave the insulation away carefully. You can pick these up in a decent hardware or home improvement store (I buy mine at Menards). I strongly recommend sticking to Kershaw or Buck. Many other brands have blades that can’t take or hold an edge (guess how I know). The linked knife is my every day carry, and it gets used for everything.

Tools

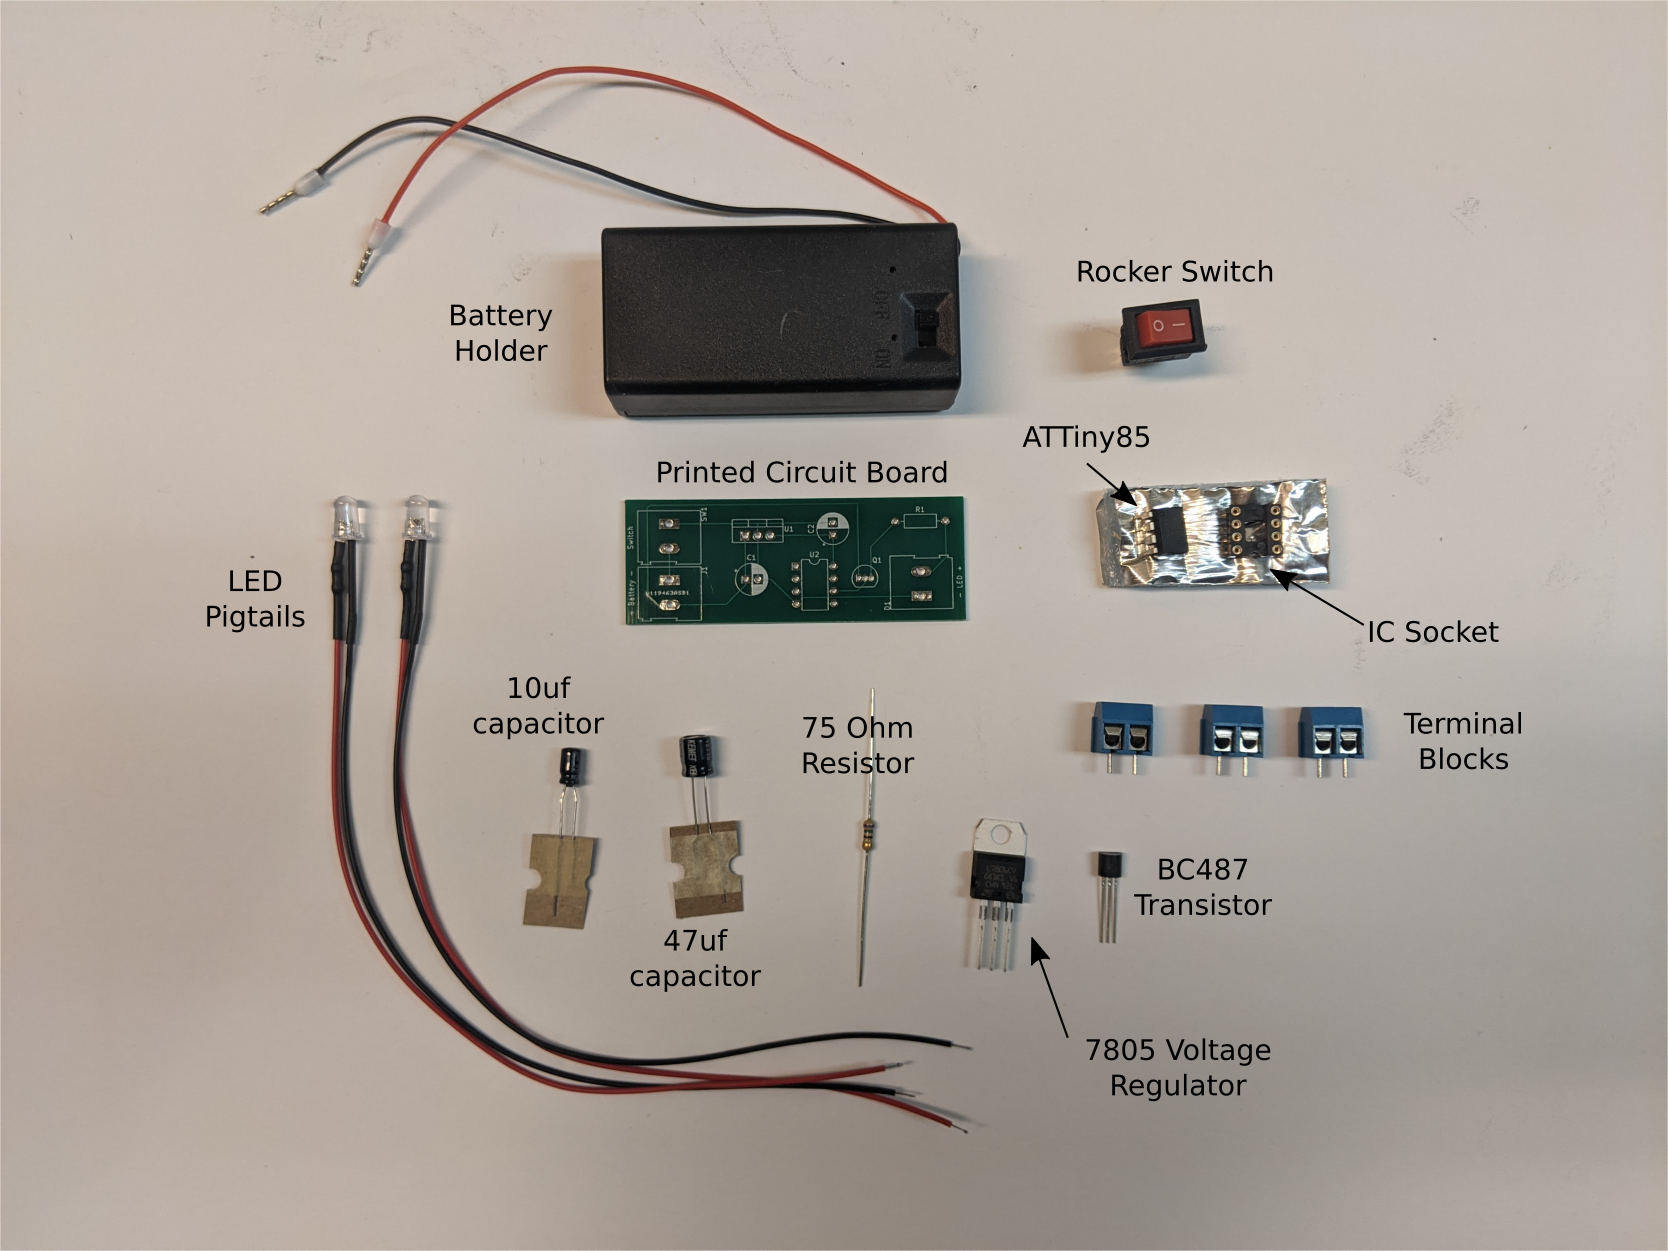
Haunted Pumpkin Parts
The software running on the board.
void setup(void)
{
    pinMode(1, OUTPUT);
    randomSeed(analogRead(0));
}

void loop(void)
{
    for (int i = 0; i < 255; i++)
    {
        analogWrite(1, i);
        delay(10);
    }
    digitalWrite(1, HIGH);

    delay(random(5,60) * 1000);

    for (int i = 255; i > 0; i--)
    {
        analogWrite(1, i);
        delay(10);
    }
    digitalWrite(1, LOW);

    delay(random(20, 120) * 1000);
}
We also fooled around with learning how to code for our device. After three hours of fooling around, it looks like this:
bool is_light_on = false;

void setup(void)
{
    pinMode(1, OUTPUT);
    randomSeed(analogRead(0));
}

void fade_on() {
  fade_on_at_speed(10);
}

void fade_on_at_speed(int speed) {

    if (is_light_on) {
      return;
    }

    for (int i = 0; i < 255; i++)
    {
        analogWrite(1, i);
        delay(speed);
    }
    digitalWrite(1, HIGH);
    is_light_on = true;
}

void fade_off() {
  fade_off_at_speed(10);
}

void fade_off_at_speed(int speed) {

    if (is_light_on == false) {
      return;
    }

    for (int i = 255; i > 0; i--)
    {
        analogWrite(1, i);
        delay(speed);
    }
    digitalWrite(1, LOW);
    is_light_on = false;
}

void normal_blink(void) {
    fade_on();
    delay(random(30, 120) * 1000);

    fade_off();
    delay(random(5, 30) * 1000);
}

void wink(void) {
  fade_off_at_speed(1);
  delay(250);
  fade_on_at_speed(1);
}

void two_blink(void) {
  fade_on();
  delay(10 * 1000);

  wink();
  delay(400);
  wink();

  delay(10 * 1000);
}

void loop(void)
{
  if (random(1,5) == 1) {
    two_blink();
  } else {
    normal_blink();
  }
}
Sign Up
Registration is currently closed.